一、自定义组件
1、自定义组件
自定义组件,最基础的结构如下:
@Component
struct Header {
  build() {

  }
}
提取头部标题部分的代码,写成自定义组件。
1、新建ArkTs文件,把Header内容写好。
2、在需要用到的地方,导入引用即可
@Component
export struct Header {
  private title: ResourceStr = ''

  build() {
    Row() {
      Text(this.title)
        .fontWeight(FontWeight.Bold)
        .fontSize(24)
    }
    .width('100%')
    .margin({ bottom: 10 })
  }
}
import { Header } from "../conponents/CommonHeader"
@Entry
@Component
struct Index {
@State
build() { // UI描述,内部声明式UI结构
Column({ space: 10 }) {
Header({ title: "商品列表" })
}
.width('100%')
}
.backgroundColor('#f0f8ff')
.padding(20)
.width('100%')
.height('100%')
}
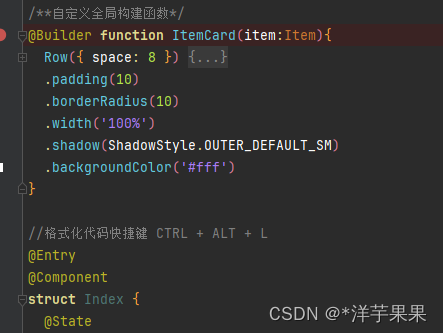
}2、构建函数
如果是仅在该页面内部运用的组件,就可以用构建函数的方式来定义组件
分两类:全局和局部,区别就是写在struct函数外还是内,若是放在struct之内,就不需要些‘function’字段了
这样封装,就保证了代码易读易维护
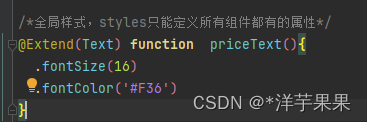
3、公共样式
类似的,样式也可以这样封装
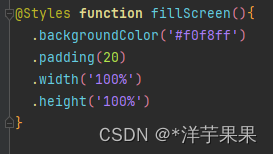

但是Styles只能封装所有组件都有的公共属性,那对于个别的如何处理呢
就需要用到Extend(注意:只能定义成全局的,不能写在struct函数内部)
二、状态管理-装饰器
1、@State
@State装饰器官网文档
@State类似于react中的UseState,只在组件内部使用
@Entry
@Component
struct StatePage {
  @State message: string = "hello"

  build() {
    Column() {
      Text(this.message)
        .fontSize(20)
        .onClick(()=>{
          this.message = '测试'
        })
    }.width('100%')
  }
}
2、@Props
@Prop装饰器官网文档
父组件单向传值给子组件,类似于react里的props参数,可以理解为父组件参数拷贝一份给子组件
子组件数值的变化不会同步到父组件
//子组件
@Component
struct CountDownComponent {
  @Prop count: number = 0;
  costOfOneAttempt: number = 1;

  build() {
    Column() {
      if (this.count > 0) {
        Text(`You have ${this.count} Nuggets left`)
      } else {
        Text('Game over!')
      }
      // @Prop装饰的变量不会同步给父组件
      Button(`Try again`).onClick(() => {
        this.count -= this.costOfOneAttempt;
      })
    }
  }
}

//父组件
@Entry
@Component
struct ParentComponent {
  @State countDownStartValue: number = 10;

  build() {
    Column() {
      Text(`Grant ${this.countDownStartValue} nuggets to play.`)
      // 父组件的数据源的修改会同步给子组件
      Button(`+1 - Nuggets in New Game`).onClick(() => {
        this.countDownStartValue += 1;
      })
      // 父组件的修改会同步给子组件
      Button(`-1  - Nuggets in New Game`).onClick(() => {
        this.countDownStartValue -= 1;
      })

      CountDownComponent({ count: this.countDownStartValue, costOfOneAttempt: 2 })
    }
  }
}
3、@Link
变量与其父组件中对应的数据源建立双向数据绑定
可以理解为父组件把地址给子组件,所以改变能够同步
@Link装饰器官网文档
//子组件接收变量
 @Link count: number
 @Link costOfOneAttempt: number

//调用子组件,因为是引用的方式,所以要加上$
 CountDownComponent({ count: $countDownStartValue})
4、@Provide 和 @Consume
应用于与后代组件的双向数据同步,应用于状态数据在多个层级之间传递的场景,实现跨层级传递
就是爷爷和孙子之间直接沟通
不需要一级一级的显示传参
@Provide装饰的变量是在祖先组件中,@Consume装饰的变量是在后代组件中
感觉很方便,但一般咱不用,因为比较消耗性能
@Entry
@ComponentV2
struct Parent {
  @Provider() str: string = 'hello';

  build() {
    Column() {
      Button(this.str)
        .onClick(() => {
          this.str += '0';
        })
      Child()
    }
  }
}


@ComponentV2
struct Child {
  @Consumer() str: string = 'world';

  build() {
    Column() {
      Button(this.str)
        .onClick(() => {
          this.str += '0';
        })
    }
  }
}
5、@Observed 和 @ObjectLink
用于在涉及嵌套对象或数组的场景中进行双向数据同步
因为对于非简单类型,比如class、Object或者数组,是需要被@Observed装饰的,否则将观察不到其属性的变化
/**子组件定义包包的类型*/
@Observed
class Bag {
  public id: number;
  public size: number;

  constructor(size: number) {
    this.id = NextID++;
    this.size = size;
  }
}
@Observed
class User {
  public bag: Bag;

  constructor(bag: Bag) {
    this.bag = bag;
  }
}

/**子组件*/
@Component
struct ViewA {
  label: string = 'ViewA';
  //被引用的类需要用ObjectLink装饰
  @ObjectLink bag: Bag;

  build() {
    Column() {
      Text(`ViewA [${this.label}] this.bag.size = ${this.bag.size}`)
        .fontColor('#ffffffff')
        .backgroundColor('#ff3d9dba')
        .width(320)
        .height(50)
        .borderRadius(25)
        .margin(10)
        .textAlign(TextAlign.Center)
        }
       Button(`ViewA: this.bag.size add 1`)
        .width(320)
        .backgroundColor('#ff17a98d')
        .margin(10)
        .onClick(() => {
          this.bag.size += 1;
        })
    }
}
}

/**父组件*/
@Entry
@Component
struct ViewB {
  @State user: User = new User(new Bag(0));

  build() {
    Column() {
      ViewA({ label: 'ViewA #1', bag: this.user.bag })
        .width(320)
    }
  }
}
三、页面路由
把所有访问记录存在栈里,类似于出栈入栈,跳转就添加一条记录,回到上一页就是把当前记录弹出栈,就回到了上一页(ps:页面栈的最大容量是32)
如果新访问的页面是栈里存在的,把它挪到栈顶即可,这样节省空间性能
1、跳转
有两种方式:保留访问记录就用pushUrl,如果要销毁记录,就用replaceUrl
import router from '@ohos.router';
class DataModelInfo {
  age: number = 0;
}

class DataModel {
  id: number = 0;
  info: DataModelInfo|null = null;
}

function onJumpClick(): void {
  // 在Home页面中
  let paramsInfo: DataModel = {
    id: 123,
    info: {
      age: 20
    }
  };

  router.pushUrl({
    url: 'pages/Detail', // 目标url
    params: paramsInfo // 添加params属性,传递自定义参数
  }, (err) => {
    if (err) {
      console.error(`跳转失败, ${err.code}, ${err.message}`);
      return;
    }
    console.info('跳转成功!');
  })
}
2、回到上一页
返回用即可
import router from '@ohos.router';
//回退到指定的home页
router.back({
  url: 'pages/Home'
});
//不传参,即是回退到上一页
//router.back();
3、综合小案例
跳转到对应页面

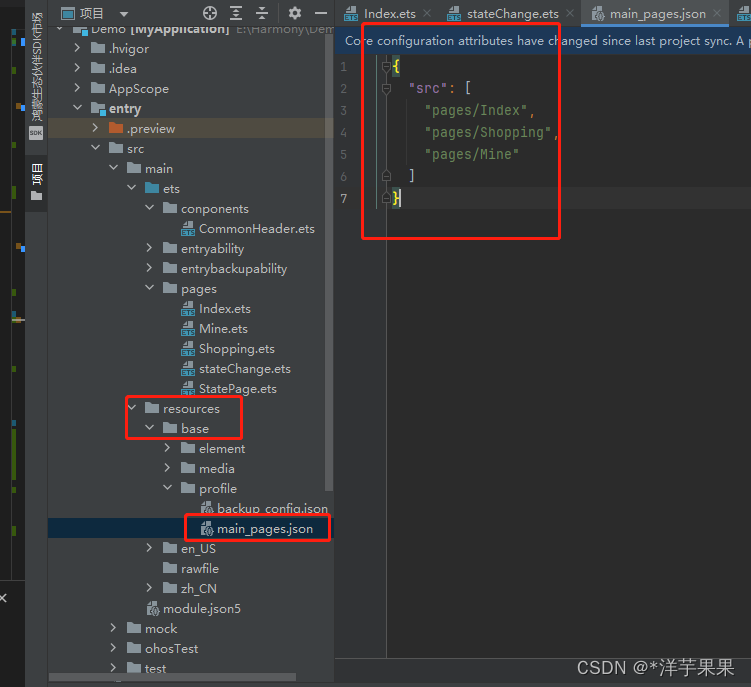
如果新建页面时,选择的是新建page,则自动配置路径,若是选择ArkTs,则是没有的
import router from '@ohos.router';

class RouterInfo {
  url: string
  title: string

  constructor(url: string, title: string) {
    this.url = url;
    this.title = title
  }
}

@Entry
@Component
struct Index {
  @State message: string = '页面列表'
  private routers: RouterInfo[] = [
    new RouterInfo("pages/Shopping", "商品"),
    new RouterInfo("pages/Mine", "我的"),
  ]

  build() {
    Column() {
      Text(this.message)
        .fontSize(30)
      List({ space: 15 }) {
        ForEach(
          this.routers,
          (router: RouterInfo, index) => {
            ListItem() {
              this.RouterItem(router, index + 1)
            }
          }
        )
      }
    }.width('100%')
  }

  @Builder
  RouterItem(r: RouterInfo, i: number) {
    Row() {
      Text(i + '.').fontSize(20).fontColor(Color.White)
      Blank()
      Text(r.title).fontSize(20).fontColor(Color.White)
    }
    .width(120)
    .padding(12)
    .backgroundColor('#38f')
    .borderRadius(20)
    .onClick(() => {
      router.pushUrl(
        {
          url: r.url,
          params: i
        },
        router.RouterMode.Single,
        err => {
          if (err) {
            console.log(`跳转失败${err.message}${err.code}`)
          }
        }
      )
    })
  }
}
写在最后,可结合Harmony_鸿蒙专栏阅读